
Japan seems to be the ultimate Asian country dream (I’m not speaking for all here). But who wouldn’t want to fly to Japan and experience authentic Japanese foods? Their kimono? The clean-everything-country? The anime and Pokemon? And even the weird stuff like Mario Kart, Maid Cafe, Robot Cafe, and capsule hostel? So if you’re given an opportunity, you grab it fast and with no doubt. That’s what my mom did!
P.S Japan can be really expensive but with proper planning and Japan itinerary, it doesn’t have to be. I went with my family of five, 2 parents in 50s and 3 adult kids.
Double P.S. We purchased a JR Pass for 7 Days. So most of our train rides are planned to maximize this pass.
Airfare


My ever YOLO queen mom saw a Jetstar promo one night that she decided to booked an airfare to Japan with no plans, visa and will soon expire passports of me and my siblings. She’s not even fully aware of the airline. She got our tickets for 11,000 pesos round trip each which were already cheap given that our travel dates are just 3 months away. I knew someone who got her tickets for 8,000 pesos round trip but it was booked almost a year before.
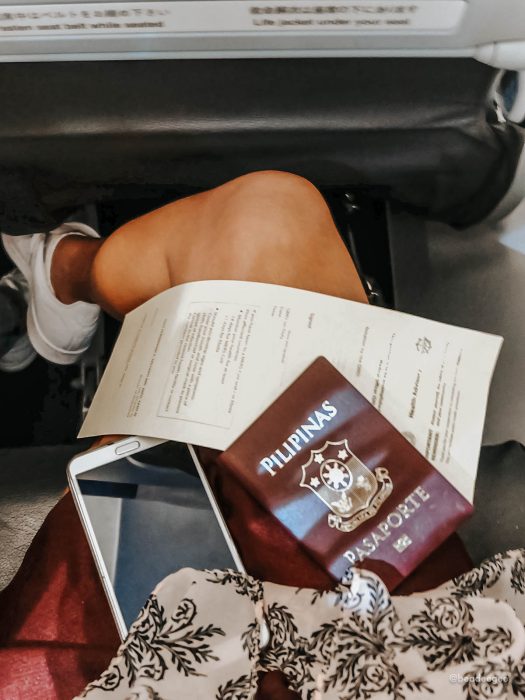
So we were flying with Jetstar for the first time. If you are not familiar with the airline, Jetstar Airways is an Australian low-cost airline and wholly owned subsidiary of Qantas. We had an ungodly hour flight of 12:50 midnight to Japan but thank God they’re not delayed. The plane reminds me of Cebu Pacific’s but a lot cleaner and smaller leg room. But overall, our experience with Jetstar is good and would definitely fly again. Also, another thing you need to know about them is that they take your hand luggage seriously. IT. IS. STRICTLY. SEVEN. KILOS.
Here’s how to find cheap flights to Japan with Traveloka. You can compare airfares there to find the best flights for your trip to Japan. You can also choose from the airlines flying directly to Narita airport such as Philippine Airlines, Cebu Pacific, Airasia, Japan Airlines and ANA.
READ MY FIRST TIME FLYING EXPERIENCE WITH JETSTAR (TO TOKYO!)
Visa Processing

If you are a Philippines passport holder like us, welcome to the ever hassle visa application process. Similar to Korean visa application, you just have to submit all the needed requirements and no interviews. So let’s start:
- Visit the Embassy of Japan website. In the Type of Visa section, look for what you’ll be applying for. We had the Visa for Tourism. So I’ll be only talking about this.
- Download this form and fill it up. Here’s a sample visa application form. Attach a photo of you in 4.5cm x 4.5cm with white background.
- Now gather the required documents: My parents submitted their NSO and marriage certificate, business permits of their businesses, ITR & bank certificate. My siblings passed a certificate of enrollment from their colleges, NSO and an affidavit of support from my parents. And me, as a young professional, I submitted my NSO, ITR, Certificate of Employment and my bank certificate with around 100k pesos. You have to prove you can finance yourself and not poor enough here in PH to be a TNT there.
- You need to submit your itinerary as well in this format. I draft a skeleton of our itinerary, nothing too detailed, but only a list of places we’ll go in that specific date.
- When you have everything, pass all the requirements in their accredited agencies. We went with Reli Tours in SM Megamall and they have a handling fee of 950 pesos/person.
- Wait for the call. But most likely, family visas are good to go! 🙂
Japan DIY Itinerary (with budget)

Day 1 (OSAKA)
12:50 AM – Flight to Tokyo
This is the only direct flight schedule of Jetstar to Tokyo.
6:00 AM – ARRIVAL TO NARITA INTERNATIONAL AIRPORT


From the airport, we took the Narita Express (3,000 YEN but included in the JR Pass) to Tokyo Station. The train is spacious and the travel from Narita to Tokyo only took 53 minutes.
10:30AM – Shinkansen ride to SHIN-Osaka
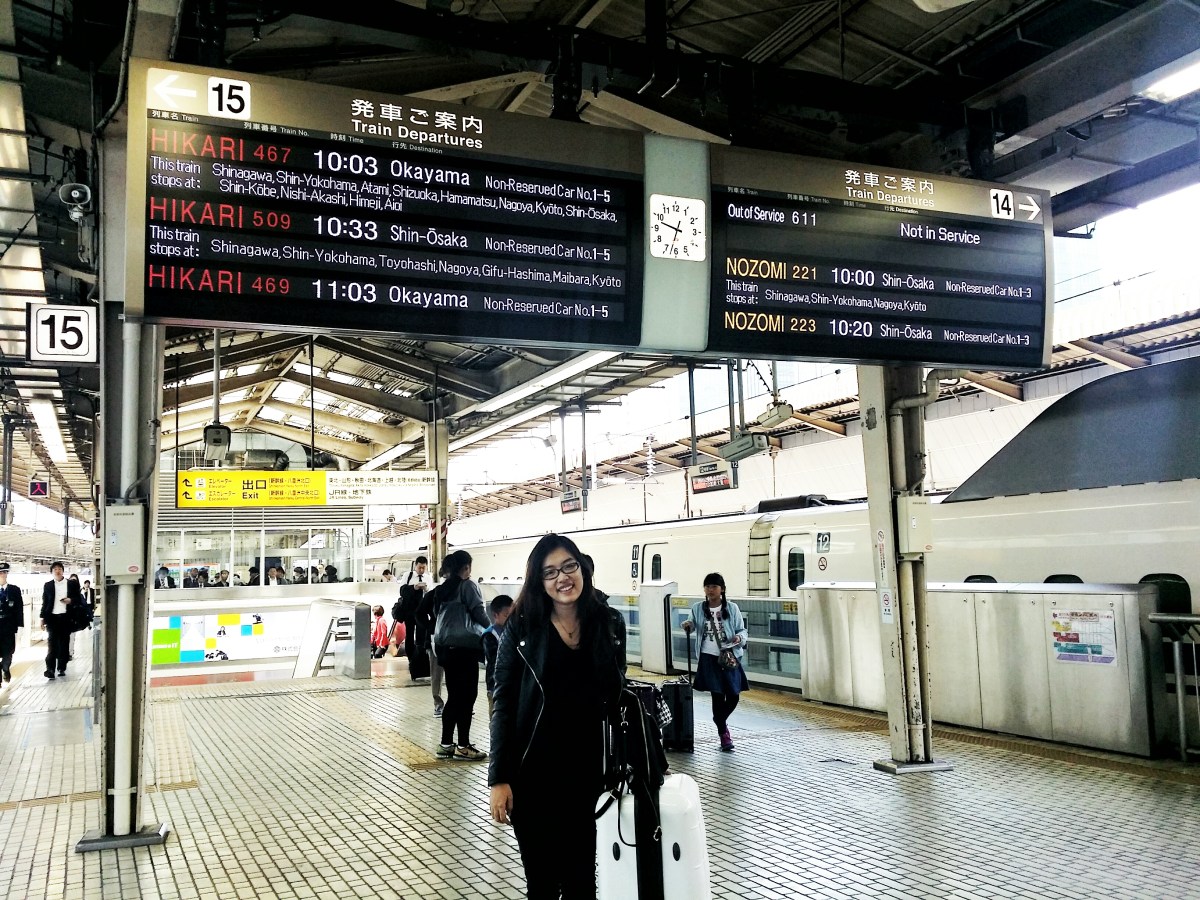
We decided to start at Osaka so we took the bullet train which cost almost 14,000 YEN one way. If you purchased a JR Pass, it is included as well. Travel time just took 3 hours.
1:30PM – ARRIVAL AT SHIN-OSAKA STATION/LUNCH
There are restaurants just outside the station.
2:30PM – CHECK-IN IN OUR AIRBNB

Since we’ll be using the shinkansen more, we decided to just rent an airbnb near it. We paid 14,000PHP for our 3 nights stay. The place is clean, spacious and has complete appliances like stove, washing machine, hair blower, kitchen tools. If you’re still not in airbnb, you can use my referral link so we’ll have both discount on your first booking.
Here’s the link to the airbnb.
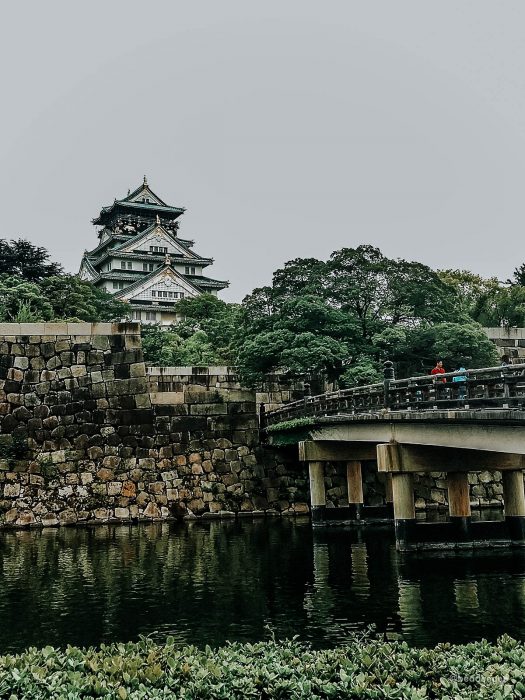
3:00PM – Osaka Castle

We decided to roam Osaka already since we don’t have much time. We started of course with Osaka Castle. If you’re using the JR Pass, better stick with Osaka Loop Line (JR Line). We went down at Osakajokoen Station.
4:30PM – UMEDA SKY BUILDING
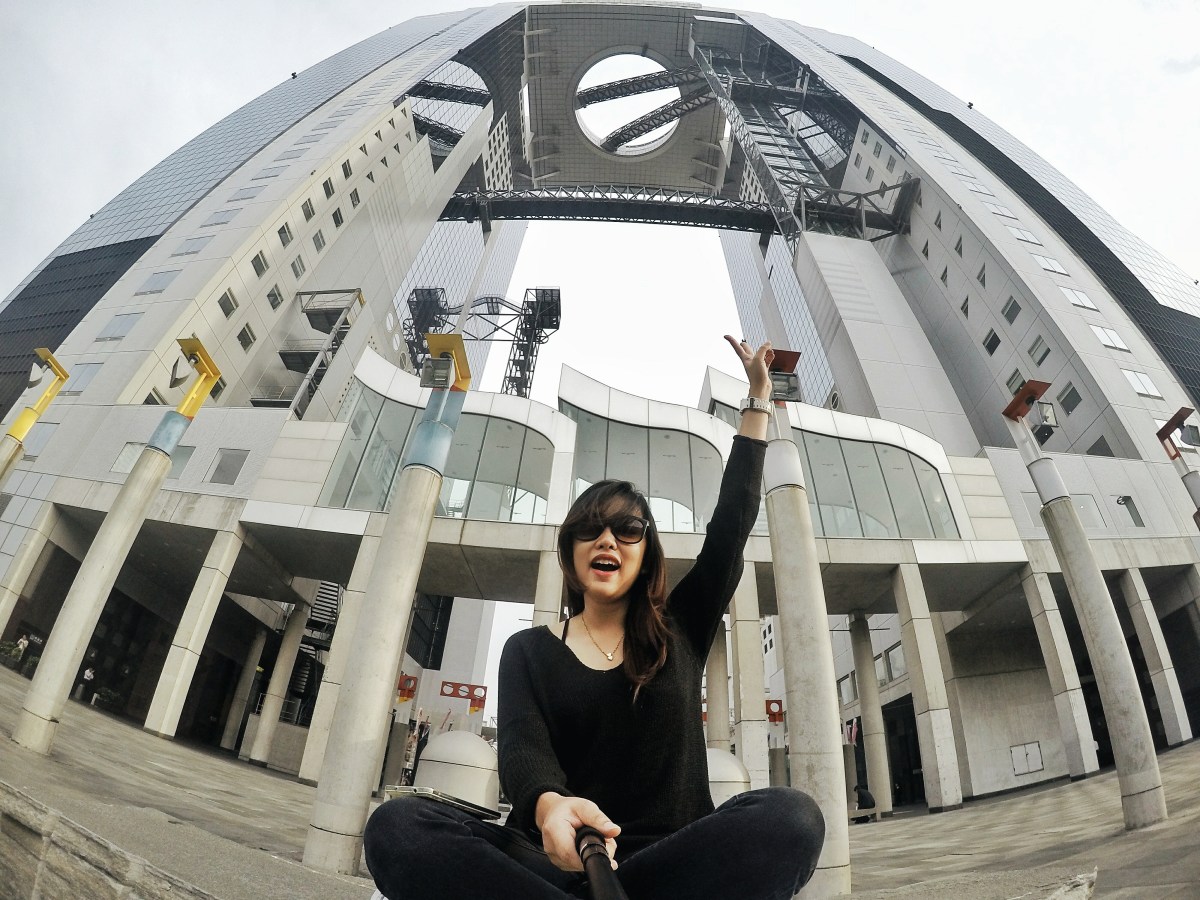
One of the famous building in Osaka is the Umeda Sky Building where you can see the whole Osaka city in a bird’s eye view. Still in Osaka Loop Line, alight in Osaka Station and prepare for a long walk.
6:30PM – Dohtonbori street

And of course, your Osaka trip won’t be complete without dropping by Dohtonbori area to eat and see the Glico Man.
READ JAPAN: EXPLORING OSAKA
DAY 1 EXPENSES: 18,420 PHP
Travel tax – 1620 PHP
JR Pass (7 days transpo) – 12,500 PHP
Airbnb – 14,000/5 = 2,800 PHP
Food (breakfast in the train + lunch + dinner + snacks) – 1500 PHP
DAY 2 (USJ)
07:30AM – Universal Studios Japan

We went early to USJ because we wanted to avoid the crowd. We ate some breakfast in the McDonald’s outside. The ticket queue is not that long in the morning and even though that opening hour is at 9 AM, we were able to go inside at 8:30 AM.
Read Japan: A Guide to Universal Studios Japan
07:00PM – Went home and dinner
We decided to just sleep early since it will be a whole day of walking tomorrow.
DAY 2 EXPENSES: 5,000 PHP
Mcdonald’s breakfast – 300 PHP
USJ ticket – 3,500 PHP
Lunch inside USJ – 700 PHP
Dinner – 500 PHP
DAY 3 (KYOTO)
7:30AM – GOING TO KYOTO STATION

From Shin-Osaka Station, we rode the shinkansen again to Kyoto for it is faster and also to take advantage of our JR Pass. Travel time is only 15 minutes via the bullet train (1,240 YEN) and more than 30 minutes via the service train.
8:30AM – FUSHIMI INARI
 For our first stop, we wanted to see the famous torii gates of Kyoto and Fushimi Inari has hundreds of them leading to the mountain. We didn’t finish until the end because we only have a day in this city. I also got to taste the best takoyaki ever here.
11:30AM – ARASHIYAMA


Another famous Kyoto town is the Arashiyama. I enjoyed this town a lot because of the simple and outskirt vibes it got. The neighborhoods around look like the ones in Doraemon. And there are many places to see – Arashiyama Bamboo Grove, shrines, Arashiyama bridge, Arashiyama monkey park. This is worth a visit even though it is 30 minutes away from Fushimi Inari.
READ A DAY IN KYOTO PART 1
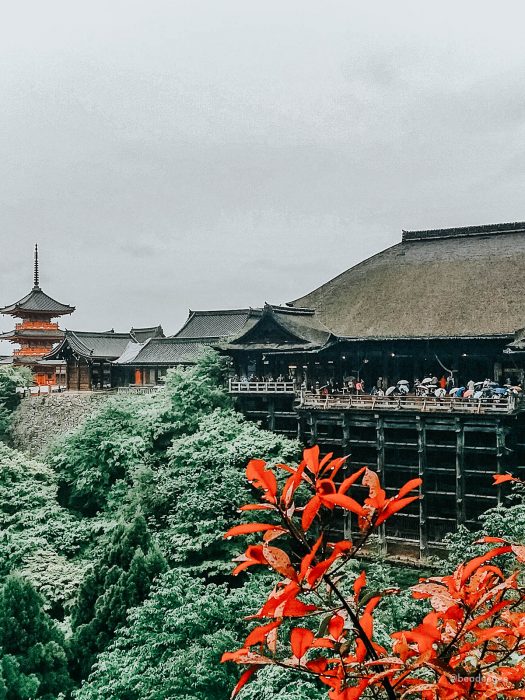
2:30PM – Kiyomizudera Temple / Higashiyama Street


A UNESCO World Heritage Site, Kiyomizudera temple left as in awe. The temple is gorgeous and rich in culture. With the trees around the temple, I’m sure it’s prettier during cherry blossom and autumn. Just outside the temple is the Higashiyama street where there are a lot of souvenir and food shops.
5:00PM – GION STREET
 In hopes to see a Geisha, we went to Gion Street. Luckily, we saw one walking the street but decided to respect her and not take a photo.
7:00PM – GOING HOME
We has dinner in Kyoto Station and roamed a little while in the mall inside the station. Then, we rode the bullet train again back to Shin-Osaka Station.
READ A DAY IN KYOTO PART 2
DAY 3 EXPENSES: 1,470 PHP
Fushimi takoyaki – 250 PHP
Lunch & Dinner – 600 PHP
Snacks – 450 PHP
Kiyomizudera entrance – 170PHP
DAY 4 (NARA)
10:30AM – AIRBNB CHECK-OUT
Everyone was so tired already so we decided to sleep in a little more. We checked-out of our airbnb and ate some breakfast from the convenience store. Then, we rode a service train in the JR Kyoto Line (still included in the JR Pass) from Shin-Osaka Station and went down at Nara Station.
11:30AM – Nara Station
Train ride took us almost 45 minutes. We deposited our luggages in the lockers available in the station. Then walked for almost 20 minutes to Nara Park.
12:00NN – NARA PARK/ TODAIJI TEMPLE


Nara Park is famous for their friendly deers who you can choose to feed so that you can take good photos with them. Unluckily for us, it started raining when we got there. Some of the deers take refuge on the big trees or stores around. Also, in Nara Park is the Todaiji Temple. This is one of the most gorgeous temple in Japan. Entrance fee is 500 YEN.
3:00PM – Late lunch in Nara Station

4:00PM – Shinkansen ride back to Tokyo
7:00PM – SHIBUYA AIRBNB CHECK-IN

We chose to stay in Shibuya because who wouldn’t even? It is very much alive even at wee hours of the night. But don’t worry this airbnb is tucked in a little far away from the city noise. It is in a residential area, 15 minutes walk away from the Shibuya crossing. It is spacious and has 3 double beds that is match for family travels.
Here’s the link of this airbnb.
DAY 4 EXPENSES: 6,000 PHP
Todaiji Temple entrance: 250 PHP
Food: 1500 PHP
Nara luggage locker: 250 PHP
Airbnb: 20,000/5 = 4,000 PHP
DAY 5 (TOKYO)
READ JAPAN: A FIRST-TIMER’S GUIDE AND ITINERARY TO TOKYO
8:30AM – Breakfast at Family Mart
Seriously, they have the good plus cheap food there.
9:30AM – Shibuya Crossing & Hachiko

From our airbnb, we decided to take the Shibuya Hachiko entrance to experience the famous Shibuya crossing and to see the famous loyal dog, Hachiko. We are a dog-lover family so seeing Hachiko’s statue is surely on the itinerary.
10:00AM – Meiji SHRINE


Just one train ride away from Shibuya Station is the Meiji Shrine in Harajuku Station. It is the grandest Shinto shrine in Tokyo in dedication to their Emperor and Empress Meiji. The entrance has this large wooden torii gate and a beautiful path surrounded by trees. This place brings peace so much different from the concrete jungle outside of it. We are also lucky to witness a traditional wedding here.
12:30PM – Lunch in Harajuku
2:00PM – Ueno Park
Ueno park is the largest park in Tokyo and it is the most beautiful in the cherry blossom season. There’s nothing much to see except the Ueno Zoo if you have kids.
4:30PM – Shibuya Shopping
My parents are tired of all the walking so they wanted to go back to Shibuya and just roam around that eventually turned into a shopping spree.
9:00PM – Sensoji Temple at night


I met with a friend and he brought me to Sensoji Temple at night. He told me that it will be much prettier at night and I’ll understand soon when I go in the morning. The temple is indeed gorgeous and peaceful at night.
11:00PM – Ichiran Shibuya

Then we ate dinner at this famous ramen bar. It was indeed delicious!
DAY 5 EXPENSES: 1,100 PHP
Breakfast + Lunch – 500 PHP
Snacks at Ueno Park – 200 PHP
Ichiran Ramen – 400 PHP
Shibuya Shopping – 3,000 PHP (*optional)
DAy 6 (HAKONE / MT FUJI)
8:00AM – Breakfast at Shinagawa Station
From Shibuya Station, we took the Yamanote Line to Shinagawa Station where we will ride a shinkanses to Hakone (Odawara Station). We bought some snack that we ate at the train.
9:00AM – Bought Hakone Free Pass

Bullet train travel time just took 30 minutes. In Odawara Station, we purchased a Hakone Free Pass for 4,000 YEN to give us unlimited access to the trains, trams, cable cars and boat rides in Hakone for one day.
9:30AM – Odakyu Train Ride


Firstly, we took the tozan train from Odawara Station to Gora in Hakone. The view is nice and green.
11:00AM – Hakone Sightseeing Cruise
 From Gora, we took a bus to Hakonemachi to ride this pirate ship look a like. We traverse Lake Aishi in hopes to see Mt. Fuji but it was cloudy.
11:45AM – Togendai Ropeway


Still part of the Hakone free pass is the Togendai ropeway. We first saw Mt Fuji here but it is slightly hidden from the clouds.
1:00PM – Hakone Tozan Cablecar

To avoid confusion, their Tozan cablecar is actually a tram. It is very much like the one in Hongkong. From Sounzan where the ropeway dropped us, we took this tram back to Gora.
3:30PM – Gotemba Outlet Store

From Gora, we rode a bus (still a part of the free pass) to Gotemba Outlet Store. If you’re into branded things, you’ll love it here. Most of the bags and shoes are in an outlet store price. We took our time here.
4:30PM – Mcdonald’s Super Late Lunch
Since we were so eager to finish all the attraction in Hakone, we had a late lunch in Mcdonald’s Gotemba Outlet.
5:30PM – MT. FUJI SIGHTING

Finally the clouds disapper during the sunset that we were able to see Mt. Fuji! We actually thought, we won’t be able to witness him. My camera didn’t do justice on how gorgeous he is.
7:00PM – Our way back to Tokyo
DAY 6 EXPENSES: 3,000 PHP
Hakone Free Pass – 2000 PHP
Food (very tipid na kami) – 1000 PHP
Gotemba Outlet Store – 0 PHP (can’t afford HAHA)
DAY 7 (TOKYO AGAIN)
9:00AM – Breakfast at Family Mart again
It is the best breakfast place, I swear.
10:00AM – SENSOIJI TEMPLE


My friend was right. It was super crowded in the morning!! We can’t take decent photos because of the gazillion tourist. We just did some rituals available around and roam around Nakamise Shopping Street just beside the temple. We ate some of the street foods and bought some souvenirs
Note: The nearest station in Sensoiji Temple is not a JR Line. From JR Kanda Station, we transfer to Ginza Line to reach Asakusa Station (170 YEN).
12:30NN – Tokyo Sky Tree

From Sensoiji Temple, we walked 10 minutes to Tokyo Skytree. We didn’t purchased an entrance to the top but instead went up on the adjacent building for free. It has the same view of Tokyo and Sumida River as well. #TipidHacks
2:00PM – Late lunch in the mall below Tokyo sky Tree
3:30PM – AKHIBARA Yodabashi
We walked again back to Asakusa Station from Tokyo Sky Tree and rode a Ginza Line to Akihibira Station (170 YEN). Just outside Akhirabara Station, is the largest electronic store in Akhibira. I bought my Fujifilm X-A2 here for only 23,000 PHP.
5:00 PM – Odaiba


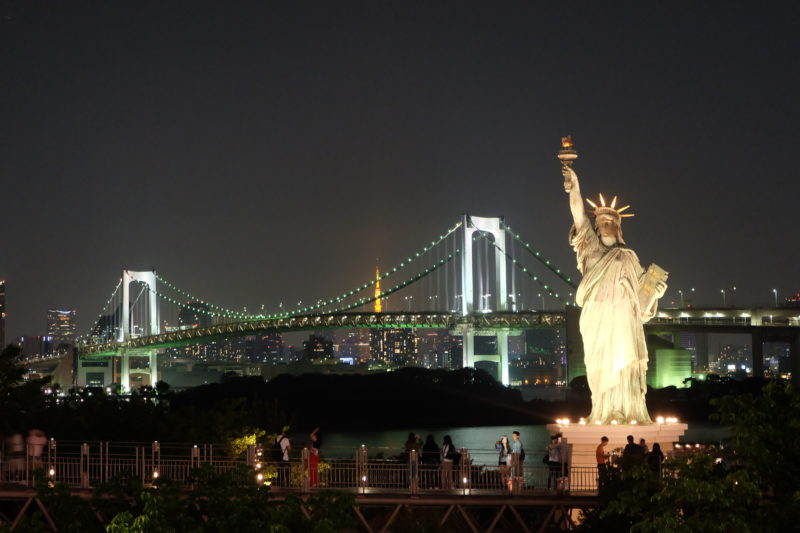
Odaiba is an artificial island in Tokyo that is famous for its entertainment and modern architecture. This is where I see a robot receptionist, a giant Gundam statue, a Rainbow bridge and building.
From Akhibara Station, we took the JR Line to Shimbaishi Station. From Shimbaishi, we purchased a train ticket (320 YEN / not included in JR Pass) to try the yurikamome train which is an elevated train without a driver. It was so cool.
DAY 7 EXPENSES: 2,990 PHP
Food: 1,500 PHP
RT Train ticket to Asakusa: 170 PHP
RT Train ticket to Odaiba: 320 PHP
Souvenirs: 1,000 PHP (mahal ng souvenirs nila)
DAY 8 (TOKYO PART 3)
11:00 – AIRBNB CHECK-OUT / TOKYO STATION
We checked out late because everyone is tired already. From Shibuya Station, we ride the train to Tokyo Station for 195 YEN. We only availed a JR Pass for 7 Days so it’s already expired by this time.
In Tokyo Station, we put our luggages in the luggage counters for 500 YEN.
12:30 PM – Shinjuku Lunch

For our last day, we decided to just roamed around Shinjuku. We ate our lunch first on the first restaurant we saw outside the station.
1:00PM – GODZILLA HEAD
As we were walking, we passed by this Godzilla head in one of the shopping streets. I thought it was cute.
1:30PM – TAITO GAME STATION

Just across the Godzilla head is a game station. We wanted to play some arcades but it was somehow pricey! But this purikura got our attention so we tried that instead for 400 YEN. So kawaii~~~
2:00PM – UNIQLO SHOPPING

My mom saw this huge Uniqlo store and we went gaga over it. Everything is cheaper here than in Manila.
4:00PM – Keisei Bus Tokyo Shuttle
Since our JR Pass is already expired, the Narita Express is a little pricey (3,000 YEN) for us. We decided to take the Keisei Bus Tokyo Shuttle just outside Tokyo Station for only 1,000 YEN. This bus will directly bring us to Narita Airport.
7:30 PM – Bye Japan
DAY 8 EXPENSES: 1600 PHP
Train ride to Tokyo Station: 100 PHP
Luggage Locker: 250 PHP
Train ride to Shinjuku RT: 200 PHP
Lunch: 350 PHP
Purikura: 200 PHP
Shuttle to Airport: 500 PHP
Uniqlo shopping (2 shorts): 800 PHP *optional
TOTAL EXPENSES: 50,680/PERSON
Airfare: 11,000 PHP
Travel tax: 1,620 PHP
JR Pass: 12,500 PHP
Accommodation: 6,800 PHP
DAY 1 (OSAKA): 1,500 PHP
DAY 2 (USJ): 5,000 PHP
Day 3 (KYOTO): 1,570 PHP
Day 4 (NARA): 2,000 PHP
Day 5 (TOKYO): 1,100 PHP
Day 6 (HAKONE): 3,000 PHP
Day 7 (TOKYO): 2,990 PHP
Day 8 (TOKYO): 1600 PHP
If you’re planning for a Japan tri-city with convenience then you can have this budget as a guide. I know this is a little high but this is the reality of Japan. Food and train rides are expensive most especially if you’re with your parents since you need to take account their convenience.
TRAVEL GUIDE

Is the JR Pass worth it?
JR Pass will entitled you of unlimited train rides to all JR Lines (I repeat ONLY JR lines, there are a lot of train companies) and bullet trains for a given number of days. It is not sold inside Japan. We got ours in Reli Tours here in Manila for 12,500 PHP EACH valid for 7 days. So is it worth it? If you’re a family and want to explore Tokyo, Osaka, Kyoto and Hakone, then yes it is worth it! Considering my aging parents and picky siblings, they won’t survive overnight buses. I just planned our train rides wisely (just taking JR trains) to maximize the pass.
BUT if it was just me, I won’t purchase it. Kyoto and Nara are more accessible by bus and Tokyo is by subway thus they offer unlimited ride promos like Kyoto’s 1 or 2 day/s bus pass and Tokyo’s Subway 3 Day Ticket. And there are overnight buses (Tokyo to Osaka starts at 1,500 pesos one way) that can take you in different cities and provinces of Japan. With this kind of set-up, it will cost you around 8k to 9k pesos for transportation. So, getting a JR Pass boils down on your travel lifestyle.

Airbnb or Hotel?
We are a family of 5 adults and most of the hotels will require us to get two rooms which is more expensive. Solo travelers and couples can save a lot with cheap or backpacker hotels. And I don’t think I can put my mom on a cheap hostel with no elevators. So we went for an Airbnb.
Since we are staying for 8 days in Japan, dining three times a day can cost you more than 1,500 pesos. To save money from food we got an airbnb because mostly of them have a kitchen where we can cook breakfasts and dinners we brought from the Philippines or we bought in the grocery. Bonus, they have a laundry.
So based on our experience, we saved a lot from Airbnb. We stayed on a 4 star hotel on our 5 days Korea trip last year for 30k pesos. We spend the same amount on our 8 days Japan trip this year. Additional bonus is some airbnbs have pocket wifis you can bring.
Tokyo? or Osaka? or both?
I know there are other cities like Hokkaido and Hiroshima but let’s focus on the 2 big ones. We managed Tokyo, Kyoto and Osaka in 8 days but it surely is fast phased and really tiring. My family had a good training from our previous travels that they can walk a whole day without complains. So if you have kids or and old family member who can’t walk all day, I advised you to just pick either Tokyo or Osaka. But if you’re staying for more than 10 days, then go see both. Osaka is a laid back city while Tokyo is more wild, advanced and techie.
Going on a Japan trip with your family soon? Or maybe went already? Let’s talk in the comment section below!

4 Comments. Leave new
I always wanted to go to Japan with my family but the flight cost was too high. How long is the validity of Japan Visa? Thank you for sharing this. ❤️
– kimacracker.com
Nice blog! Will definitely use this as a guide for our Japan trip this March. 🙂
luh siya!
Hiii do you also speak nihonggo ? If not po did you hire a translator?? TIA!